For the Builder Base building with the same name, see Archer Tower/Builder Base
"Archer Towers have much longer range than Sablon:Hs, and unlike Sablon:Hs they can attack flying enemies."
Sablon:ToggleMode

|

|

|

|

|

|
| Level 1 | Level 2 | Level 3 | Level 4 | Level 5 | Level 6 |

|

|

|

|

|
|
| Level 7 | Level 8 | Level 9 | Level 10 | Level 11 | Level 12 |
|
|
|

|
|

|
| Level 13 | Level 14 | Level 15 | Level 16 | Level 17 | Level 18 |
|
|
|
|
|
|
|
| Level 1 | Level 2 | Level 3 | Level 4 | Level 5 | Level 6 |
|
|
|
|

|

|

|
| Level 7 | Level 8 | Level 9 | Level 10 | Level 11 | Level 12 |

|
|
|
|

|

|
| Level 13 | Level 14 | Level 15 | Level 16 | Level 17 | Level 18 |
- Summary
- Archer Towers are a single target defense in the Home Village.
- They are the second defense available to players, unlocked at Town Hall 2.
- Archer Towers are extremely versatile structures. They are able to target both Ground and Air Units, and they have excellent range. This versatility means that they should form the cornerstone of every player's defense.
- Starting from level 10, an Archer Tower can be geared up by the Master Builder if he is available and at least one Sablon:B in the Builder Base is upgraded to level 6. This gives the Archer Tower a "Fast Attack" mode, which increases its damage output at the expense of its range, like the Sablon:Bs in Builder Base.
- Defensive Strategy
- Archer Towers can target both Ground and Air Units at an amazing distance. Therefore, it is generally a good idea to place them on the outer perimeter of the village. Doing so allows players to capitalize on the excellent range and provides good coverage for the rest of the defenses.
- As Archer Towers have the ability to target both Ground and Air Units, a good strategy would be to place all of the other defenses within range of at least one Archer Tower.
- It is typically a good idea to upgrade Archer Towers before you upgrade Sablon:Hs. Although they are more expensive and take longer to upgrade than similar-level Sablon:Hs, Archer Towers have more range and can target air units as well as ground units.
- It is typically wise to put an Archer Tower near a Sablon:H or Mortar due to the fact that neither of these two defenses can target air units.
- Place Fast-Attack Archer Towers in particular weak-spots or possible “Queen Walk” areas. It can quickly take down any sponges such as Giants, P.E.K.K.As, Dragons and even Lava Hounds, and also can deal damage to a queen in a queen walk.
- Placing a Wizard Tower or Air Bomb near an archer tower can help with its single-target weakness, especially against hordes of minions and balloon parades.
- Offensive Strategy
- Their ability to target both Ground and Air Units makes Archer Towers formidable defenders. However, Archer Towers are only able to damage one unit at a time. This makes it very easy to overwhelm them with large groups of Archers or Barbarians.
- When deploying only a few Balloons, it is advisable to keep them away from an Archer Tower, as their slow movement speed makes them an easy target. However, Balloons deployed in large numbers will quickly destroy an Archer Tower while only losing one or two Balloons. After the Archer Towers (and Air Defenses) are taken out, the Balloons will proceed to destroy the rest of the village (although Wizard Towers and time can still be a problem). You can also place a group of Archers (around 15-25) and let them do the work.
- The best choices for attack are high health troops combined with low health, high attack Troops, as the high health troops will soak up all the damage, leaving the low health ones to attack.
- At higher levels, archer towers are placed outside walls with low-health buildings. Strong solo troops like a Super Barbarian or a Valkyrie can destroy it.
- Upgrade Differences
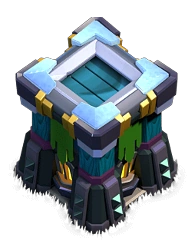
- Archer Towers undergo significant visual changes at levels 6, 11, 13 and 16.
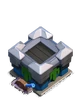
- When initially constructed, the Archer Tower has an open wooden lattice supporting a flat wooden platform; an exterior wooden ladder leads from the ground to the platform level. From levels 2 through 5, the lattice structure and wooden platform both receive additional reinforcement.
- At level 2, the Archer Tower gets 4 short posts on the top and the wood gets thicker. The ladder also moves to the left.
- At level 3, the Archer Tower gets gray stone paddings on the legs and the short posts connect each other on the platform. The ladder moves back to the middle.
- At level 4, the Archer Tower has the paddings turn into supports and a small green flag is added under the platform. The wood slightly changes color and the ladder is now to the right.
- At level 5, the Archer Tower gets a solid stone base which connects each support with the ladder moving to the left.
- At level 6, the lattice supports and ladder are removed, and solid vertical supports are added. The wooden platform receives stone battlements and the green flag is extended to cover the interior.
- At level 7, the stone battlements around the platform are reinforced and the solid stone base is taller to completely obscure the interior.
- At level 8, the Archer Tower receives metal braces at the bottom of each leg.
- At level 9, the Archer Tower's flags get shorter to reveal the interior again and the braces on each leg gets bigger and have spikes.
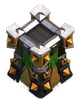
- At level 10, the flags get larger again, golden plates get placed around the whole tower, additional golden plates get added to the middle of the wooden supports and the wooden supports gets darker.
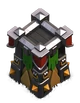
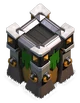
- At level 11, the color scheme completely changes as all the wood is replaced with dark iron, the braces on each leg merges with the middle golden plate covering most of corner and the battlements receive dark iron shields on each corner.
- At level 12, the tower gains brass guard shields on the top corners. The base of the tower has brass plating on the sides and reinforced corner guards with new spikes and brass ornaments on it.
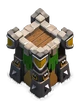
- At level 13, the tower's battlements are overhauled, sporting metallic corner pieces with a red-colored shield on each corner. The tower's corner guards' spikes at the base turn golden. The planks where the Archers stand also switch directions, and are now dark gray in color.
- At level 14, the corner pieces turn white and now sport golden spikes. The battlements themselves become bronze. Large golden spikes replace the smaller spiked braces, and the base is reinforced by a stone lining.
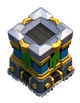
- At level 15, the foundations of the tower become a two-toned smooth concrete-like material. The spikes on the foundations disappear, the brass ornaments becomes bigger. The corner pieces at the top of the tower become black stone with slightly smaller spikes.
- At level 16, the corner pieces are white-topped gray blocks, and are slightly lower to be more in line with the draped battlements. The spikes on the pieces are now absent. The foundations of the tower are now overhauled again, with its pillars being steel-gray with similarly colored bolts, as well as electric coils on the sides. The part of the tower just below the corner pieces is now dark blue in color.
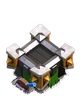
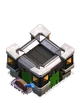
- At level 17, the battlements gain golden guards, and golden lining is present on the base and on the corner pieces of the tower. The bolts are now golden in color as well.
- At level 18, the battlements corners turn snow blue and the golden guards shrink a little. There are now small spikes on the bottom of each pillar that are coloured snow blue. Under the grey plates on the pillars you can see a little bit of purple. The gold lining is changed to snow blue lining. Under the flag some light can be seen from inside the tower. Also, the planks turn a blue colour.
- The number of and apparent level of the Archers atop the tower also change with level.
- When first constructed, the Archer Tower has two Archers on its platform, with the appearance of a level 1 (or 2) Archer, and shoots normal arrows.
- At level 4, they shoot flaming arrows until the Archer Tower is level 7.
- At level 5, the Archers' appearance changes to that of a level 3 (or 4) Archer.
- At level 7, a third Archer appears, and they start shooting purple arrows (until level 11).
- At level 8, the Archers' appearance changes to that of a level 5 Archer.
- At level 10, the Archers' arrows begin to explode on impact.
- At level 11, the Archers' appearance changes to that of a level 6 Archer and they shoot flaming arrows.
- At level 13, the Archers' appearance changes to that of a level 7 Archer. The arrows they shoot are flaming reddish-pink.
- At level 16, the Archers' appearance changes to that of a level 8 Archer.
- Gearing up the Archer Tower will remove, relocate or trim most of the footings to a shape perpendicular to the floor, ostensibly to allow the tower to be lowered. On certain levels, it will also center the Archer Tower inside the grass plot on which it stands (un-geared Archer Towers are often a bit behind the center of the plot).
- Archer Towers undergo significant visual changes at levels 6, 11, 13 and 16.
- Trivia
- You don't need to train an Archer to have the Archer Tower, nor do you need to unlock the Archer in your Barracks. Any upgrades to Archers you have completed in your Laboratory have no effect on the Archer Tower whatsoever.
- The Archer Tower is the first defense that you unlock that can attack air troops.
- The number of Archers atop the tower is purely aesthetic. Archer Towers with three Archers at the top have the same range and rate of fire as towers with only two Archers at the top (although the individual Archers, which take turns to fire, will have different firing rates). This remains true if the Archer Tower is geared up and set to fast attack mode.
- The Archer Tower is one of the three defenses that have Troops on the top of it, the other two being the Wizard Tower and the Bomb Tower.
- When upgrading, the tower appears in the war base as the previous level, with no Archer on top, although it is completely functional. (The same also holds true for Wizard Towers.)
- Even though you cannot upgrade Archers to level 5 until you upgrade your Laboratory to level 6 (which requires a level 8 Town Hall), the Archers atop a level 8 Archer Tower (the max level for Town Hall 7) resemble level 5 Archers.
- A geared up level 18 Archer Tower in fast attack mode will deal the highest consistent DPS (256) of all defensive structures that can target ground and air troops.
- A player can build up to eight Archer Towers, which, along with the Sablon:H, outnumbers any other defensive structure (not counting Sablon:H).
- When the Archer Tower is in fast attack mode, the arrows from the tower appear to be coming from above the archers instead of from them.
- This may be a graphics glitch where although the archers are now at ground level, the arrow graphics still come from the original tower height.
- A max level Archer Tower set to fast attack hides the navy blue spike on the bottom of it.
Sablon:IconDescriptions
Sablon:ToggleMode
Sablon:GoldPassForm
Sablon:NumberAvailable Sablon:BuildingSize
| Level
|
Damage per Second
|
Damage per Shot
|
Hitpoints
|
Cost
|
Build Time
|
Experience Gained
|
Town Hall Level Required
|
|---|---|---|---|---|---|---|---|
| 1 | 11 | 5.5 | 380 | 1,000 | 1m | 7 | 2 |
| 2 | 15 | 7.5 | 420 | 2,000 | 30m | 42 | 2 |
| 3 | 19 | 9.5 | 460 | 5,000 | 45m | 51 | 3 |
| 4 | 25 | 12.5 | 500 | 20,000 | 3h | 103 | 4 |
| 5 | 30 | 15 | 540 | 80,000 | 8h | 169 | 5 |
| 6 | 35 | 17.5 | 580 | 180,000 | 8h | 169 | 5 |
| 7 | 42 | 21 | 630 | 360,000 | 12h | 207 | 6 |
| 8 | 48 | 24 | 690 | 720,000 | 12h | 207 | 7 |
| 9 | 56 | 28 | 750 | 1,000,000 | 16h | 240 | 8 |
| 10 | 63 | 31.5 | 810 | 1,500,000 | 1d | 293 | 8 |
| 11 | 70 | 35 | 890 | 2,000,000 | 1d 12h | 360 | 9 |
| 12 | 75 | 37.5 | 970 | 3,000,000 | 2d | 415 | 10 |
| 13 | 80 | 40 | 1,050 | 4,000,000 | 3d | 509 | 10 |
| 14 | 92 | 46 | 1,130 | 5,500,000 | 6d | 720 | 11 |
| 15 | 104 | 52 | 1,230 | 7,000,000 | 8d | 831 | 11 |
| 16 | 116 | 58 | 1,330 | 10,000,000 | 10d | 929 | 12 |
| 17 | 122 | 61 | 1,410 | 12,000,000 | 12d | 1,018 | 12 |
| 18 | 128 | 64 | 1,510 | 14,000,000 | 15d | 1,138 | 13 |
| Level
|
Damage per Second
|
Damage per Shot
|
Hitpoints
|
Cost
|
Build Time
|
Experience Gained
|
Town Hall Level Required
|
|---|---|---|---|---|---|---|---|
| 1 | N/A | N/A | 380 | 1,000 | 1m | 7 | 2 |
| 2 | N/A | N/A | 420 | 2,000 | 30m | 42 | 2 |
| 3 | N/A | N/A | 460 | 5,000 | 45m | 51 | 3 |
| 4 | N/A | N/A | 500 | 20,000 | 3h | 103 | 4 |
| 5 | N/A | N/A | 540 | 80,000 | 8h | 169 | 5 |
| 6 | N/A | N/A | 580 | 180,000 | 8h | 169 | 5 |
| 7 | N/A | N/A | 630 | 360,000 | 12h | 207 | 6 |
| 8 | N/A | N/A | 690 | 720,000 | 12h | 207 | 7 |
| 9 | N/A | N/A | 750 | 1,000,000 | 16h | 240 | 8 |
| 10 | 126 | 31.5 | 810 | 1,500,000 | 1d | 293 | 8 |
| 11 | 140 | 35 | 890 | 2,000,000 | 1d 12h | 360 | 9 |
| 12 | 150 | 37.5 | 970 | 3,000,000 | 2d | 415 | 10 |
| 13 | 160 | 40 | 1,050 | 4,000,000 | 3d | 509 | 10 |
| 14 | 184 | 46 | 1,130 | 5,500,000 | 6d | 720 | 11 |
| 15 | 208 | 52 | 1,230 | 7,000,000 | 8d | 831 | 11 |
| 16 | 232 | 58 | 1,330 | 10,000,000 | 10d | 929 | 12 |
| 17 | 244 | 61 | 1,410 | 12,000,000 | 12d | 1,018 | 12 |
| 18 | 256 | 64 | 1,510 | 14,000,000 | 15d | 1,138 | 13 |
| Gear Up Cost
|
Gear Up Time
|
Home Village Archer Tower Level Required
|
Builder Base Sablon:B Level Required
|
|---|---|---|---|
| 4,000,000 | 7d | 10 | 6 |
| Range | Attack Speed | Damage Type | Unit Type Targeted |
|---|---|---|---|
| 10 | 0.5s | Single Target | Ground & Air |
| Range | Attack Speed | Damage Type | Unit Type Targeted |
|---|---|---|---|
| 7 | 0.25s | Single Target | Ground & Air |
Sablon:UCH